The winter months can be such a festive time to transform your outdoor container gardens. In October and November, it's time to make the switch from flowering plants and tropicals to cut boughs arrangements.
We asked our in-house professional florist for tips and tricks on how to create gorgeous winter containers to extend your season and welcome guests to your home.
First, let's talk about your options to get materials:
- Some people prefer to contract with local landscapers for help. This is a great option but be sure to place your order early. The waiting lists are long and understand that you'll pay a premium for that convenience.
- Finding professional grade materials is another hassle. Some hobby and grocery stores carry limited selections, but you wind up driving all over to buy enough material to create an effective container, overfilled to create a generous, full visual effect. We've been there!
Step by Step Instructions for Winter Container Gardens
For existing containers, top off with dirt as needed. For new, please place your containers exactly where you want them before you start. Take your time and get it right, as they are heavy when full. Fill new containers with dirt to the top once they are in position.
Grab garden gloves, an old sheet or tarp, a crafty friend, and a happy, relaxed attitude. Before you get started, take a nice, deep breath. You gave yourself an opportunity to have a cool experience today. This is a process. Making garden containers takes a while. There is no such thing as perfection.
Ok, now that you are in a "good place", put on your gloves, open the box and take a nice deep breath. Mmm, we love the smell of mixed evergreen, don't you?
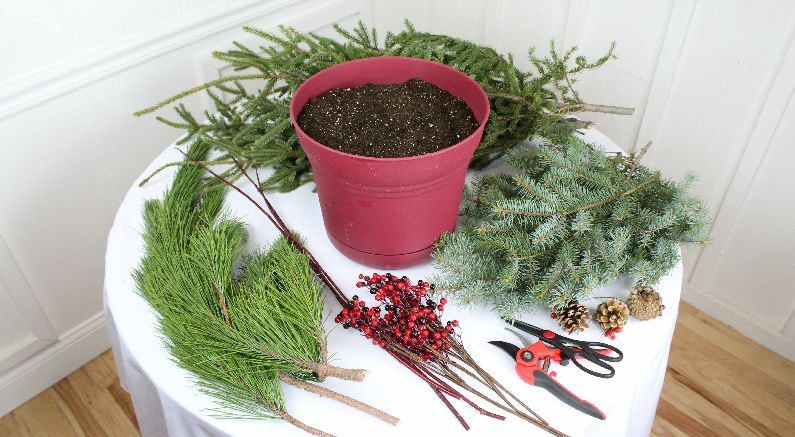
- First, take everything out of the box.
- Separate the materials into piles on your tarp or old sheet.
- Sort the evergreens into piles by type and by size.

Step 1
- Select the tallest, fullest bough and push it firmly into the dirt in your container.
- If you'll see the container from all angles, place the bough in the center.
- If you'll only see one side of the container, place the bough near the back and keep the "showiest" side facing out.

Step 2
- If you need to trim the lowest branches, cut at a 45-degree angle close to the main stem.
- Save all the little clippings to use later.

Step 3
- Add smaller boughs around the first bough.
- If you'll see the container from all angles, be sure to place boughs all around the largest bough.
- If you'll only see one side of the container, place these boughs in front of and to the sides of the largest bough.

Step 4
- Select smaller material to fill in the front.
- Use the best looking material in the front facing your guests.

Step 5
- Continue to fill and bundle several smaller boughs together if needed.
- Use your saved trimmings to fill in bare spots.

Step 6
- Tuck flat, small branchlets in under the other boughs as edging all around the pot.
- This is a pro tip that polishes and softens the look.

Step 7
- Add your focal point in place.
- It's best to bundle these together before you push them into the dirt.

Step 8
- Spread out the berry clusters and place them throughout the arrangement at high, medium and low points.
- You can wire them to the upper branches, and even use hot glue to hold in place if needed.
Caring for Your Winter Container Gardens

Spray the branches liberally with Wilt-pruf, an anti-dessicant starch spray. Plan to reapply as often as the directions say.
If you live in a frost zone, fill the container with water. The water will freeze and keep the materials intact.
It's fun to mix these up throughout the season. Try evergreen or holly branches, cut red twig dogwood stems, crabapple branches, viburnums berries, or dried Hydrangea flowers in winter pots.
Get wild! Decorate them with silver accents for New Year’s or add your team colors for the Superbowl. You’ll be so pleased to make them your own.
Enjoy these long lasting containers. Good job!
