
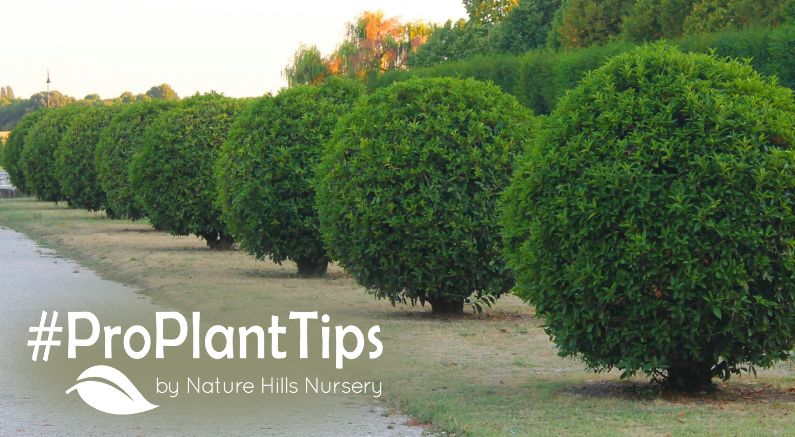
Give Your Garden Room To Grow With Perfect Plant Spacing!

When planning your landscape, spacing your plants "just right" isn't just about appearances; it's a matter of life, health, and happiness for your green companions!
New gardeners often focus on what they want now, but success means thinking about what plants will look like in 5 to 10 years. Crowded roots, blocked air, sun-starved leaves, and moisture troubles are all the fallout from ignoring proper plant spacing.
Understanding “on-center” spacing, hedging techniques, and planting patterns like zig-zag or triangular layouts can transform your space from overgrown chaos into a garden masterpiece.
Lining a driveway, padding a foundation, crafting a privacy hedge, or designing an edible landscape, all of these planting projects depend on proper spacing to ensure healthy growth and reduce maintenance down the road.
What Does "On-Center" Spacing Mean?
On-center spacing is the standard way to measure plant distance. It means the distance from the center of one plant to the center of the next. It can also mean from trunk to trunk. Imagine drawing an invisible circle around each plant's mature size. You want those circles to just barely kiss, no overlapping, no squeezing.
How To Measure It:
- Use a measuring tape stretched from one planting hole's center to the next.
- For containers or quick estimates, use a yardstick, garden hose, or string.
- Map it first on paper or with a hose layout to visualize growth before digging.
Example: If a shrub matures to 4 feet wide, plant it 4 feet on-center from the next shrub. Two plants with 3-foot spreads? Use 3 feet on-center spacing.
Why Plant Spacing Matters
Spacing your plants properly isn't just about avoiding a jungle-like mess; it's about giving each plant the chance to thrive in its own personal space! Overcrowding leads to a whole host of issues, especially in the heat of summer or during drought conditions.
- Air Circulation: Proper space between plants prevents fungal diseases and mildew. Air can flow freely, drying leaves after rain or watering.
- Sunlight Exposure: Crowded plants shade each other. Full-sun lovers may grow leggy or sparse if shaded out by nearby neighbors.
- Root Room: Each plant's roots need elbow room for water and nutrient access. Overlapping root zones compete, stunting growth.
- Maintenance Access: Leave enough space to get around your plants for pruning, weeding, fertilizing, or harvesting.
- Visual Appeal: Crammed gardens look cluttered. Thoughtful spacing allows each plant to shine and creates layered, textured designs.
- Competition for Water and Nutrients: Tightly spaced plants are like siblings fighting over dinner. Limited soil resources, especially water, quickly get depleted with too many plants vying for access. In dry spells, crowded plants suffer more and are more likely to show stress first.

Special Spacing Considerations
Breathing Room Along Foundations & Buildings
- Allow 18-36 inches between mature foliage and structures.
- Prevent moisture and pest issues against siding or windows.
- For larger shrubs or trees, give even more room - up to 5 feet.
Spacing Near Driveways & Sidewalks
- Account for vehicle door clearance and walking room.
- Plants growing over hard surfaces can be damaged or become trip hazards.
- Add buffer space for snow piling zones in colder climates. Or plant snow drift hedges.
Vertical Spacing Reminders - Beneath Eaves, Powerlines, or Rooflines
- Avoid plants that might grow into gutters, downspouts, or low roof overhangs.
- Taller shrubs or trees should be planted away from walls to avoid storm damage.
- Make sure your trees' mature height won't interfere with power or telephone lines in the future.
Spacing For Hedges
- Tight privacy hedge: Use 50-75% of mature width for spacing. A 4-foot-wide shrub gets spaced 2-3 feet on-center.
- Natural hedge or screen: Full mature width on-center or staggered for depth and visual interest.
Spacing For Airflow
- Tall Garden Phlox, Bee Balm, and Lilacs benefit from wider spacing to reduce the risk of powdery mildew.
- Use rows spaced 3-4 feet apart for vegetable plants and other edibles with 18-24 inches between plants. Fruit trees and fruiting shrubs also need plenty of shoulder room.
Spacing Around Underground Systems & Pavement
One of the most overlooked but important parts of planting design is what's underground and near pavement. Whether it's a septic system, sprinkler pipe, gas line, or your new stamped-concrete walkway, roots can wreck a lot more than your garden layout if spacing isn't right.
Why It Matters:
- Root damage: Some plants send out aggressive root systems that can crack pavement, buckle sidewalks, or crush underground lines.
- Septic sabotage: Moisture-loving roots may infiltrate and clog septic tanks or drainage fields.
- Access blockage: Utility workers may need to reach pipes or cable lines. Planting directly above can complicate or destroy landscape features during repairs.
- Trip hazards and liability: Uplifted sidewalks or cracked driveways can become not just unsightly but dangerous.
What To Avoid Near Underground Systems & Pavement:
Keep these thirsty or aggressive-rooted plants at least 25-50 feet away from septic fields and water lines:
- Royal Empress Tree (Paulownia tomentosa): Known for invasive roots and fast top growth. They can crack pavement and invade pipes quickly.
- Willow Trees (Salix spp.): Will hunt down moisture relentlessly; a common culprit in both sewer backups and broken sidewalks.
- Silver Maple (Acer saccharinum): Has shallow, wide-spreading, sometimes surface roots that buckle pavement and crowd foundations.
- Red Maple (Acer rubrum): Maple roots can lift sidewalks and break into pipes.
- River Birch (Betula nigra): Loves wet ground and can overwhelm drain fields and lift stones or pavers.
- Poplar Trees (Populus spp.): Notorious for clogging pipes and disrupting foundations.
- Cottonwoods (Populus deltoides): Similar to Poplars, but even larger and thirstier!
- Sycamore (Platanus occidentalis): Impressive canopy but a notorious root spreader under roads and sidewalks.
Safer Alternatives:
Instead of pavement-popping troublemakers, consider these safer choices for planting within 5-15 feet of hardscape edges or utility zones. If you're working near underground systems, choose trees and shrubs with less invasive root systems, roots that don't seek out water like a homing beacon, and smaller mature sizes.
- Dogwood Trees (Cornus spp.)
- Serviceberries (Amelanchier spp.)
- Dwarf Flowering Cherries (Prunus) and Purple-Leafed Flowering Plums
- Crabapple Trees (Malus spp.)
- Dwarf Lilacs like Miss Kim or Bloomerang®
- Boxwoods and compact Junipers
- Japanese Maple (Acer palmatum): Slow-growing with a restrained, polite root zone.
Pro Tips:
- Always call the Digger's Hotline 811 before digging to have utilities marked.
- Shrubs should be spaced 10–15 feet away from hardscapes or underground lines.
- Trees should be spaced 25+ feet away, depending on size and root behavior.
- For irrigation lines, avoid large shrubs or trees within 3–5 feet to prevent clogging or breakage.
- For decorative pathways, consider root barriers if planting nearby, especially with large shrubs or dwarf trees.
Other Smart Spacing Techniques
Zig-Zag or Triangular Planting
- Faster fill-in effect while maintaining airflow.
- Perfect for mass plantings, groupings, or sweeping meadows.
- Reduces erosion on slopes and creates dynamic movement in the landscape.
Drift Planting
Some plants just love to grow together, and that makes them fantastic groundcover, weed-blockers, and for en masse drifts!
- A more naturalistic grouping has plants that somewhat overlap in wide, flowing clusters rather than tidy rows.
- Better for attracting pollinators and creating organic shapes.
Seasonal Layer Spacing
- Leave gaps for early spring bulbs beneath late-blooming perennials or tall summer annuals.
- Planting for succession extends color and prevents bare soil between waves.
Tips For Measuring Plant Spacing Like A Landscape Designer
- Draw it out: Use graph paper or garden planning apps to preview spacing.
- Test placement: Lay potted plants out on the ground before planting. Or use environmentally friendly paint to mark where each plant will go directly on the ground.
- Use markers: Landscape flags or wooden stakes with twine help keep rows straight and spacing accurate.
- Account for mulch: Use arborist mulch to prevent weeds in wider plant spacings and conserve moisture.
Handy Extra Tips for Plant Spacing Success
- Always go by the mature width, not the current size!
- For windy sites, consider having less spacing between plants to reduce wind tunnels between tall plants. Or add windbreak shrubs to your tree-line.
- On slopes or water runoff gardens, stagger plants in a zigzag fashion to slow runoff and erosion.
- Use the Finger Test to check soil moisture, especially in wider-spaced plantings.
Plant Placement Perfected! Now You're Talking Spacing!

Whether you're crafting a charming cottage border or lining a long suburban fence, how you space your plants determines the future of your garden's health, beauty, and ease of care. With a tape measure in hand and mother nature on your side, even the greenest gardener can master plant placement.
Now go out, map it, measure it, and let those roots spread with joy.
Happy Planting!


